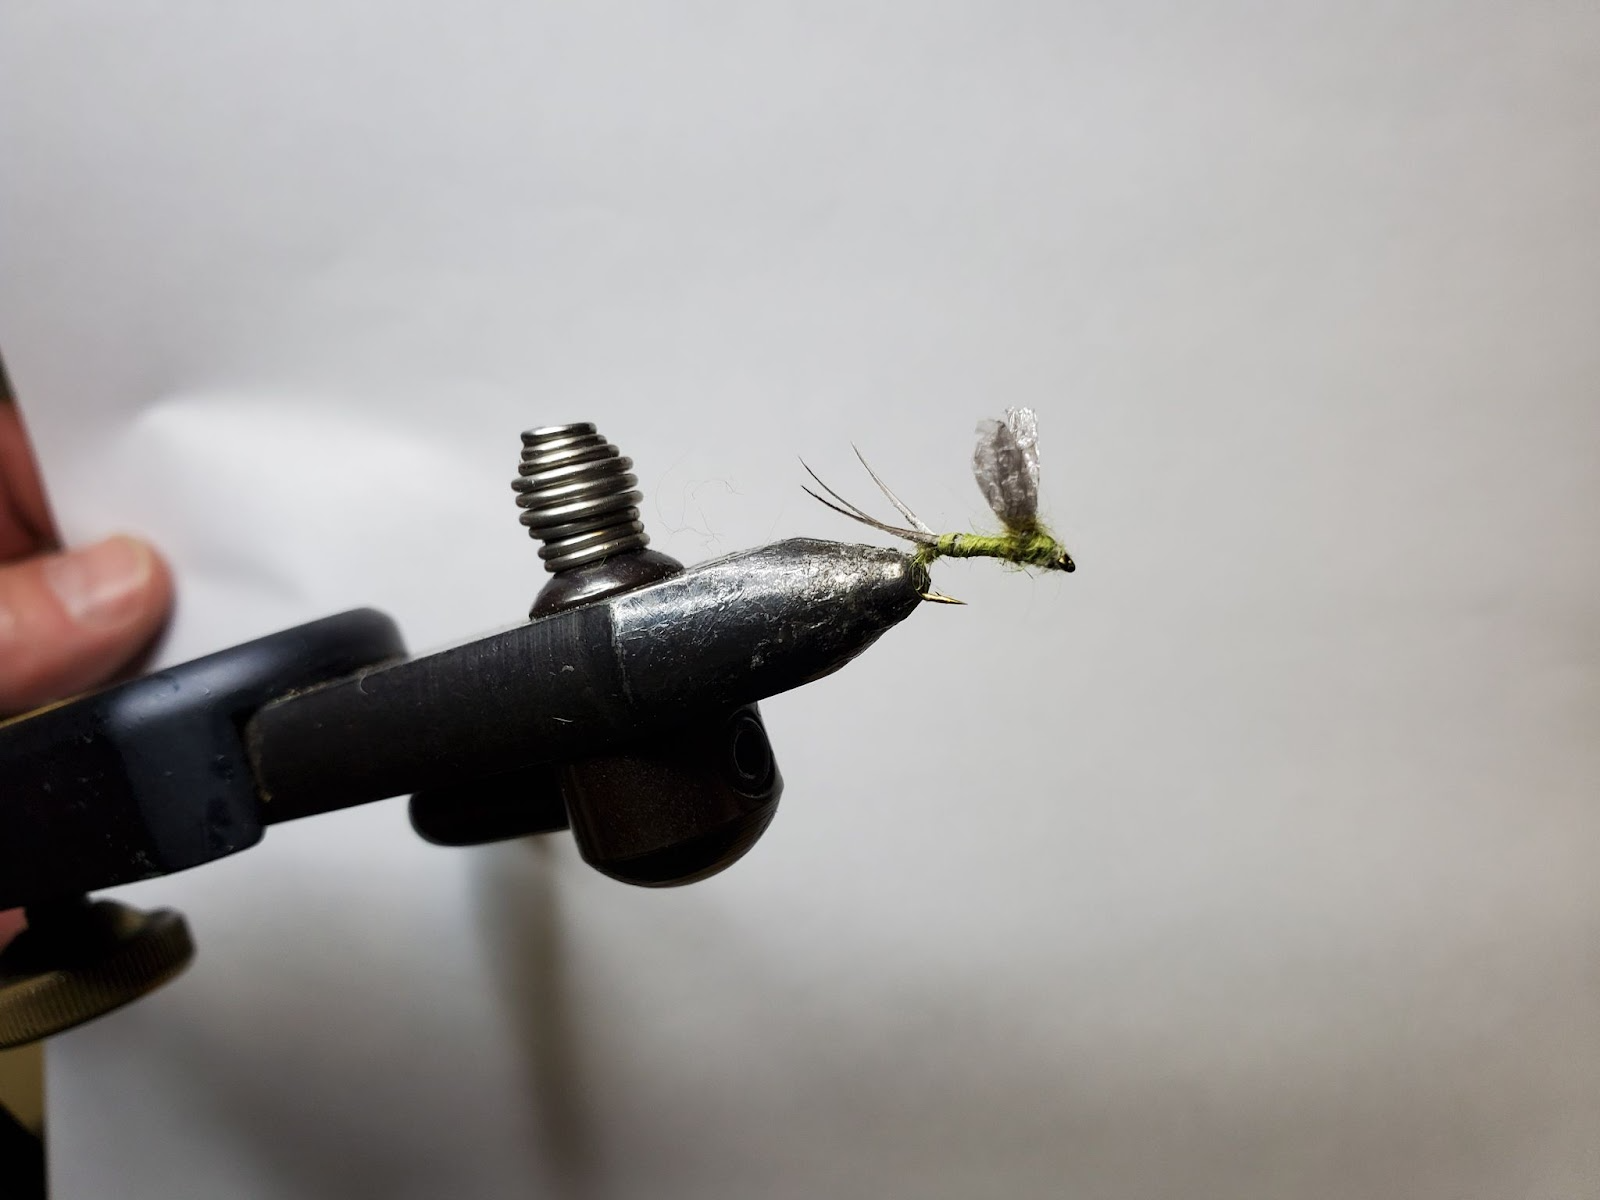
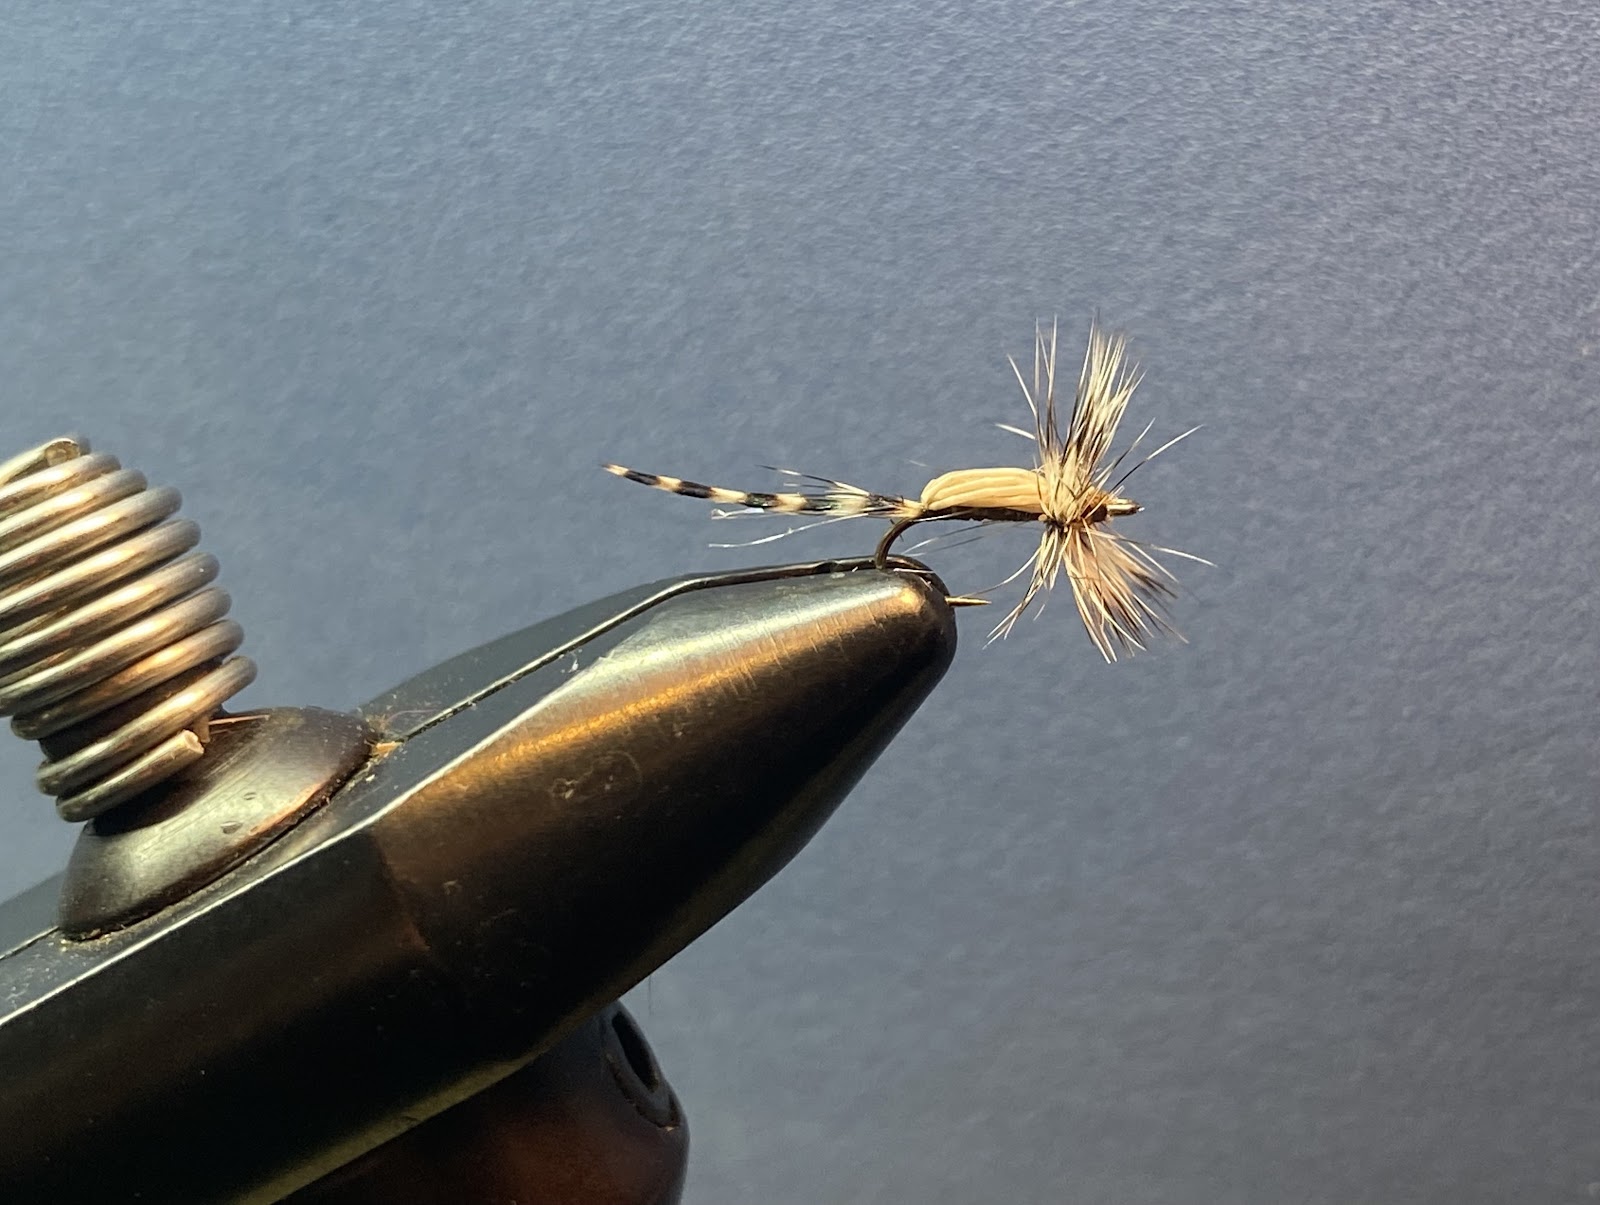
This is a specialty fly. I wish I could tell you it works all the time. It simply doesn’t, however………
In the months from March to May, when the mornings are overcast, the blue wing olive mayflies are hatching, the fish are tail slapping the surface and you know they are taking emergers, then this is the fly you want. Don’t give up on your dry fly fishing just yet. This pattern will entice many of them to take an emerger and then grab your fly in the surface film. Tied in many colors and sizes I have chosen an early season dark BWO pattern in size 16 on a sprout hook. Matching the size of the fly is more important than dialing in the perfect color.
Materials:
I use heavy or standard hooks size 16 to 20 with olive thread. The under body on larger flies can be thin sticky back foam for more buoyancy covered with dubbing, smaller flies use only olive dubbing. The tail is horse hair or natural turkey biot short fibers. The magic wing material comes from the foam sheets that line the inside of mail envelopes and are found in colors grey, white, and clear. A thicker foam works better in the riffles.
Tie a dubbing bump at the bend of the hook.
Splay the tail fibers over the bump, tie in and dub over the top. Add more dubbing to finish the body.
Cut a wing foam strip 1/8th inch by 2 inches and secure with a few figure 8’s, then cover with light dubbing.
Use one or more post turns to secure the open wing shape.
Dub a small black head and superglue the thread one inch to whip finish.
Cut the wings to shape.
This is my go-to fly pattern for BWO hatches. It outperforms all others.
Just over 100 years ago, Charles Adams and his son Lon were out fishing in northern Michigan. From what I have read, they were somewhat frustrated by not having the right flies to match a hatch. So they visited a local friend and fly tyer Leonard Halladay in Mayfield, Michigan. Mr. Halladay tried to come up with a pattern that would meet Mr. Adams’ needs and the Adams dry fly was created.
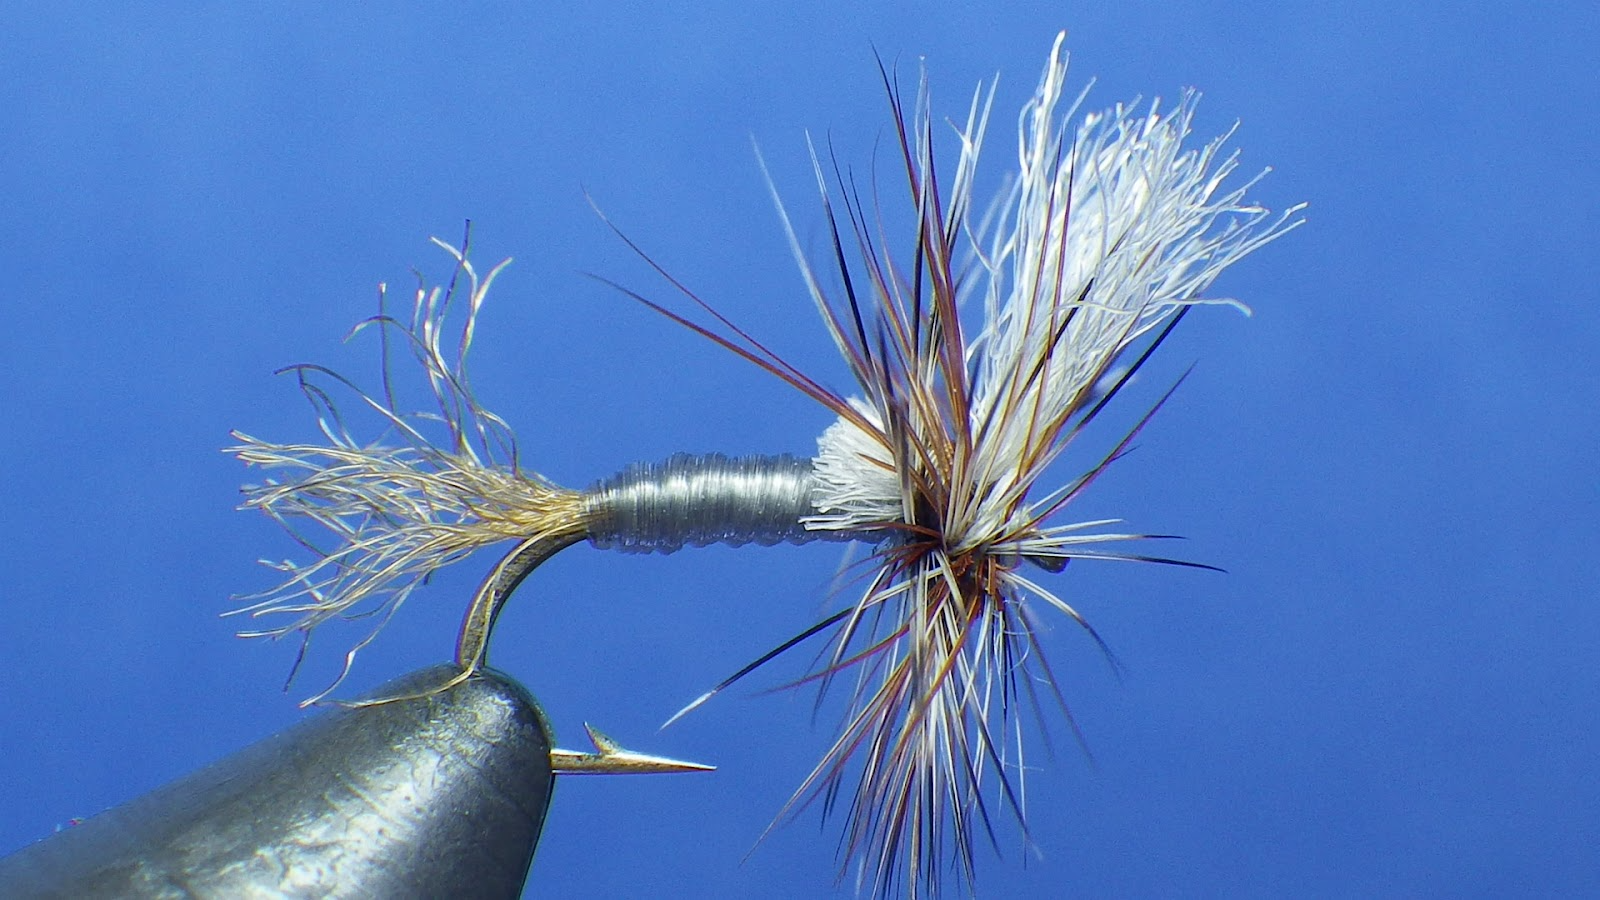
The traditional Adams is one of the few patterns that I cannot tie to my liking. I never seem to be able to get the upright wings tied in so they look right. I wonder if that’s why someone along the way created the Parachute Adams?
So let’s briefly talk about the Parachute Adams. I can tie this pattern pretty darn okay. Parachute-style flies are really not my favorite to tie, but I do tie them because they catch fish. Never one to accept “good enough” when it comes to my flies, I slogged (some would say stumbled) ahead in pursuit of a more perfect Adams. After years of exhaustive (and exhausting) research and experimentation at the bench and on the stream, my version of this classic is a mash-up of the original Adams, the Parachute Adams, the Adams Cripple from Blue Ribbon Flies and the Gray Haze Cripple from Walter Wiese at Yellowstone Country Fly Fishing that I call the Adams Special.
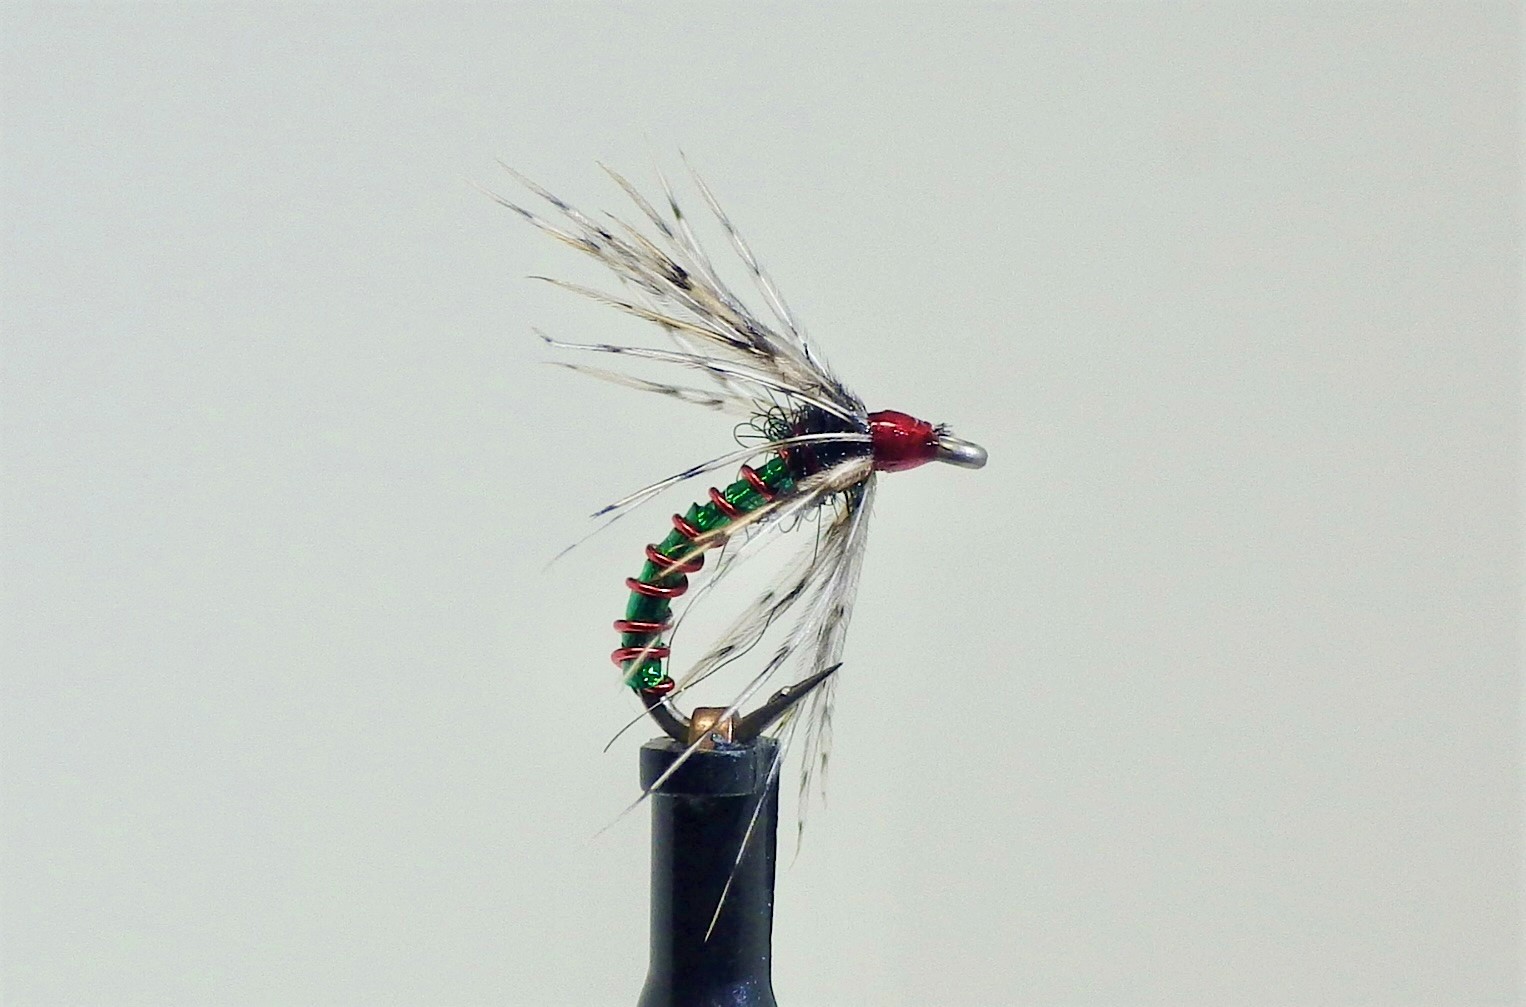
Hook: Size 16 or 18 dry fly hook
Tail: Mayfly Brown Zelon
Abdomen: Dun Bug Legs from Fly Tyers Dungeon
Wing: White Widows Web
Collar: Grizzly Rooster Hackle
For the abdomen on this pattern, I have settled on the dun-colored Bug Legs. I have not found this exact color from similar stretchy floss materials. The Bug Legs will not get darker when they get wet or covered in floatant. The poly wing is easy to see on the water just like a parachute post. The finished fly also maintains some of the same qualities of the traditional Adams. Give this pattern a try and see if it might not become your favorite Adams-style dry fly. Or you could decide to put your faith in one of the titans of fly tying who inspired my creation (Leonard Halladay, Craig Matthews or Walter Wiese) and use their version. I might sulk briefly, but I’ll get over it.
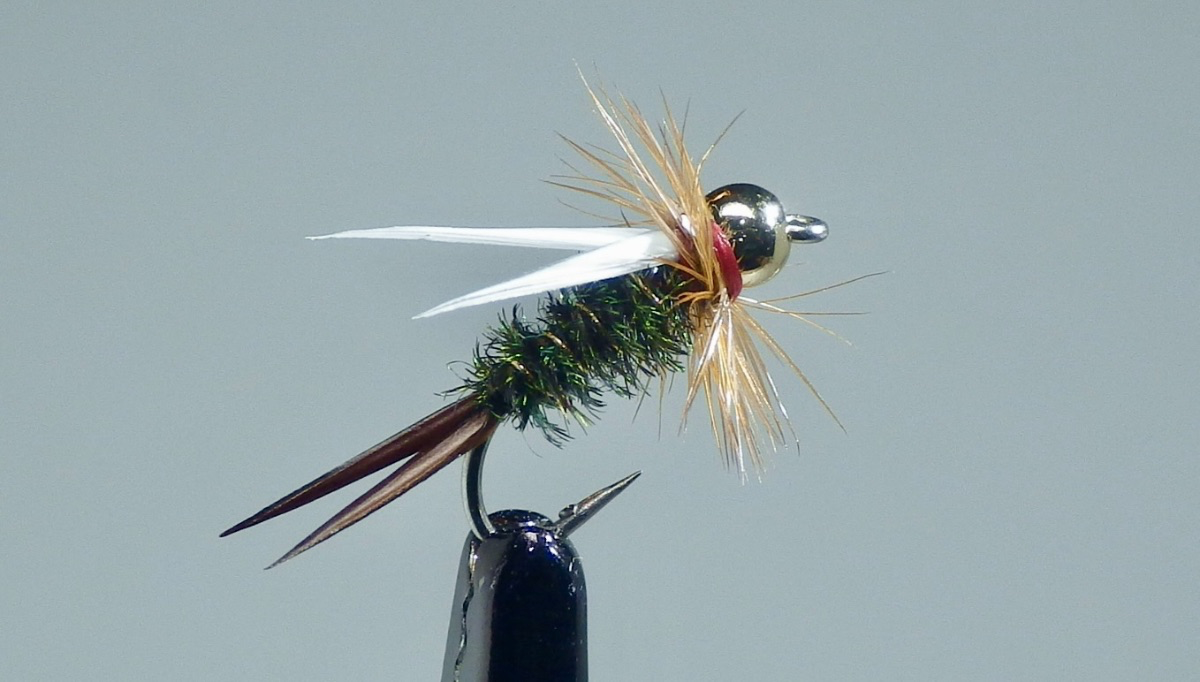
I think most would agree that the top three nymph patterns would have to be the Pheasant Tail Nymph, the Gold-Ribbed Hare’s Ear Nymph and the Prince Nymph. I’ll leave it for you to decide which is #1, #2 and #3 because they all belong in your fly box.
In this column, I want to focus on the Prince Nymph. I have been tying and fishing with a Prince Nymph for many years. I learned somewhere along the way that the fly was created by Doug Prince. What I did not know until I started to do some research on the fly was that its origins were right here in Minnesota. The original pattern was the Brown Forked Tail tied by Don and Dick Olson from Bemidji in the early 1930s. Doug Prince made some changes and renamed it the Prince Nymph which became widely available in the early 1940s.
I personally like to tie Prince Nymphs, but I will admit that they are not the easiest fly to tie. The goose biots that are used for the tail and also the wing can create some issues. You can have a nice-looking tie going and with one poor thread wrap the whole thing can go south on you. This fly is one that you just need to work at and tie a fair number (dozens upon dozens) to get it down.
Tying the white goose biots in for the wing seems to create the biggest issue. It is somewhat difficult to judge the length of the wing and also to get them tied in straight. When you finally accomplish that, it takes 47 wraps of tying thread to completely cover up the butt ends of the biots and you are left with a big blob of tying thread.
What I have started to do is to use some dry fly hackle for the collar of the fly. After I get the white biots tied in, I tie in the hackle and make 1 ½ turns with it and that covers up the butt ends of the biots and gives the fly a nice finished look.
Give this a try and let me know if the Prince Nymph moves up your list of favorite flies to tie and fish.
Before I get to the flies, I wanted to talk about Ed Constantini and myself a little bit. Ed and I are fishing and tying buddies. We both learned to tie through classes we took in the mid-’80s at Bob Mitchell’s Fly shop. We weren’t in the same class but we had similar experiences. We both still have our copies of the fly pattern recipes that Bob handed out in class and we learned the same initial patterns from Bob and his friends. If there is such a thing as a tying or fishing style, I would say that Ed and I come from similar fishing roots, have similar and compatible styles, and we have lots of fun.
Jonathan Jacobs’ KU Stonefly
When I first met Ed I told him I had just started doing some work on this website and I remember him asking me what had happened to the collection of fly patterns that were on our website. The patterns Ed remembered were originally featured in our paper Rip Rap newsletters in the days when Scott Hanson was our editor. Back then Greg Meyer, the guy who originally built and managed this website, used to feature the patterns on a fly tyers corner website page. It turned out that with updates to the site design, the pattern collection went by the wayside. One day I was poking around and ran across a collection of images from the old fly pattern page. I gathered them up and emailed them to Ed so he could have them for his own reference. Of course, Ed took the time to put these images back together with their original fly recipes. I’m sure this was a considerable amount of work on his part going through the Rip-Rap files stored on our archive page. Ed’s PDF file of Secret Kiap Flies is now on the website here and if you’d like to see the original articles check out the Rip Rap archive and start looking at Scott’s March 2008 issue and work forward. It’s worth the time. This particular issue has a great article by Jonathan Jacobs covering several early season patterns In addition to Jonathan, subsequent tyers include Michael Alwin, Brian Smolinski, Scott Hanson, Greg Meyer, Ron Kuehn, Perry Palin, and Bob Torres.
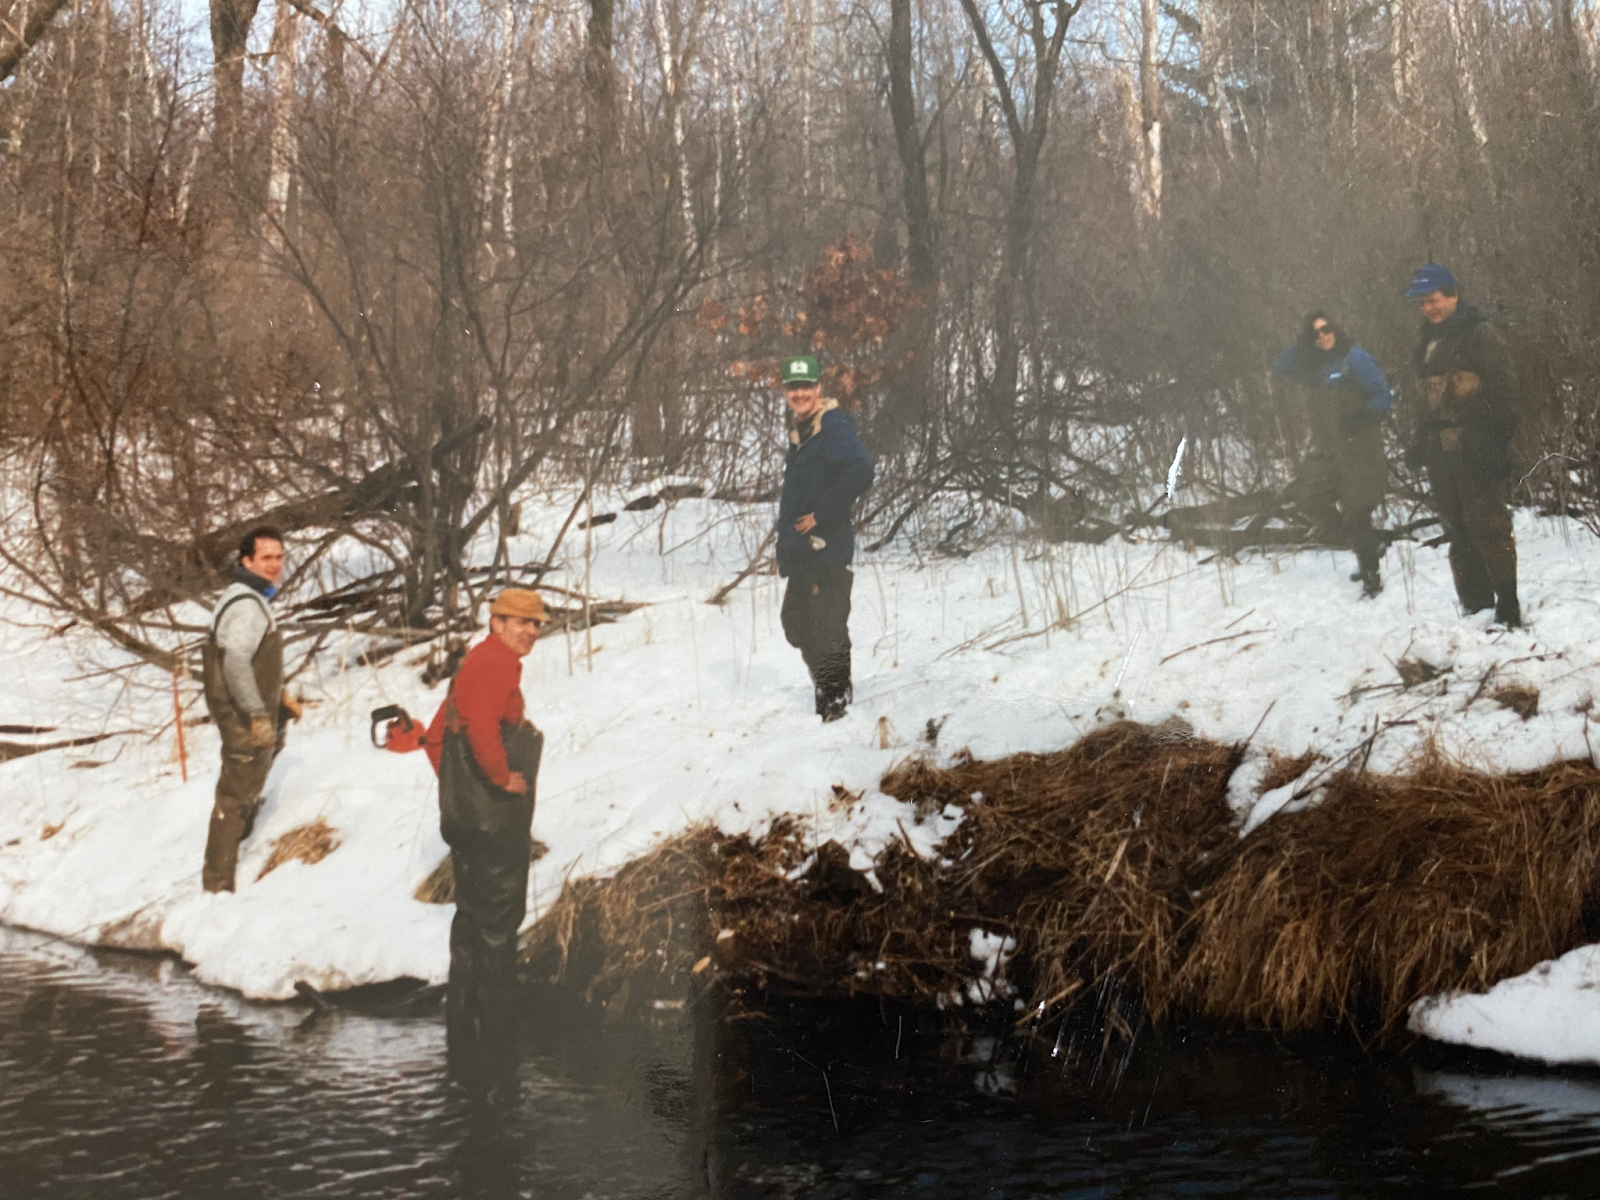
Before I go I’d like to talk about volunteering. We are not a fishing club or entertainers. We are a volunteer organization. There are lots of ways to pitch in and help our chapter. Kiap is known for getting stuff done. Our brushing work days are always well attended and often draw people from outside the chapter. In fact, that’s how I became a member of Kiap. I was a TCTU member from St Paul and went to WI to work on the Willow and ended up switching my membership. I actually have a picture from my first workday.
Left to right: Gary Horvath, Chuck Goosen, Ken Hanson, and two other TCTU members.
Photo by: Jim Humphrey
There are lots of ways to volunteer and help Kiap. Behind the scenes, there are many people including our board members and other volunteers that make things happen and get things done. Some tie and donate flies and some write grants to help raise funds. Ed and I manage our chapter’s MailChimp email service and this website. Using these tools we put out timely updates and our regular electronic chapter newsletters. We also, with help from Matt Janquart, managed our past two online auctions via the fundraising application and are currently working on the 2023 auction that will begin on March 6th. Ed is 76 and I am 64. Not the typical age range to be doing this work. Our chapter is looking for help in the areas of communication and social media. If interested, please contact chapter president Greg Olson, someone from the board, Ed, or myself. Our contact info is on this site right here.
One of my favorite all-time flies is the Lage Stop & Go Soft Hackle. This pattern was developed by one of the real treasures in our little corner of the fly fishing world, Randy Lage.
Several years ago, Randy was fishing some off-colored water on the South Branch of the Whitewater River. He was using a fly he called the Caution Fly. It was a soft hackle fly tied with a black body and gold wire. The fly was not working as well as he had hoped so off he went to his fly tying vise. Randy had just returned from a trip to Lake Taneycomo in Branson, so the materials for a local favorite fly from there, the Crackleback, were on the top of his tying kit. So he pulled out a spool of green tinsel. Now what to add to it? Red wire, some dubbing and a partridge feather. Voilà, the Stop & Go was born. Red and green, get it?
I was introduced to this pattern by Randy one evening at Laughing Trout. Never one to leave well enough alone (a recurring theme in these columns), I had to make some changes. So I switched to red tying thread and changed the thorax to Superbright Peacock Dubbing. Now I have the Lage Stop & Go Soft Hackle.
I fish this fly from early spring to late fall. Randy designed the fly to be fished using the typical soft hackle technique of casting down and across the stream. I like to fish it as the bottom fly of a two-fly rig under an indicator.
You should tie some of these flies up and give them a try. It just might become one of your favorite flies as well.
Years ago my cousin Jay (who, at the time, lived in Seattle and fished a lot for trout in lakes) gave me some tiny midge dry flies to try that he had tied up. He called them hackled Raccoons. I didn’t know much about the fly but they sure worked well for me during the winter fishing season in MN/WI. His flies had a Zelon shuck with segment marks he’d made with a fine black Sharpie.
Over time my small supply of hackled Raccoons ran low and I set out to tie up some replacements. I found some online articles that mentioned the Raccoon as a lake chironomid pattern created by Phil Rawly. I suppose the hackled part was a variation by Jay and his fishing friends.
Lady McConnell
While I continued my quest on the interwebs I came across another midge pattern, the Lady McConnell by Brian Chan, that looked a bit more like Jay’s hackled version but used a tiny grizzly hackle feather to imitate the segmentation of a trailing shuck. I thought the shuck and the fancy name were both pretty cool so that’s what I’m calling it now.
These flies get chewed up when the fish start feeding on them but it makes it all the more fun to fish with them. Just carry a few extra.
Hook: I use Daiichi 1110 (Orvis Big Eye 4641) ring eye hooks but use whatever you like. This one is an 18 so you can see it but tie them down to 22s.
Thread/Body: I like 70 denier thread but again use what you like. The thread will be the body color so pick a color (black, olive, tan, red, etc.) that might look like the midges you’re imitating. Red thread has me thinking about another old midge pattern, Herters Blood Midge, that would also be worth checking out.
Shuck Part 1: Super Secret Midge Flash from Lund’s. Length is the same as the hook gap.
Shuck Part 2: Tiny Grizzly hackle feather. Length is the same as the hook.
If you don’t have this stuff, use Zelon and a Sharpie.
Overbody: Deer hair. I clip the hair tips off and tie in tips first (starting at the hackle spot) so the overbody tapers from thin in the back to thicker in the front. I put a drop of Sally Hansen’s over this part for a little extra durability.
Collar: Grizzly hackle sized to 1.5 of the hook gap.